

Welcome to our Support Portal. Search for answers using the search box below,
or create a support ticket if you cannot find your answer.
Tip: Start typing in the input box for immediate search results.
Email Retention
The retention policy for emails, including backups and online storage, is 7 years based on the regulatory standards.
If you MUST access emails longer than 7 years move them to the “Archive” folder.
All email documents not stored in the “Archive” folder will be removed after 7 years.
“Archive” folders sizes will be monitored for mismanagement.
Inbox Rules
Automatically perform actions on certain messages, such as forwarding them to a particular folder.
- Go to the Home tab.
- Click on the Rules button in the Move group.
- Click HERE for more help.
Signatures
You can set up your own signature to be included on outgoing messages.
- Create a new message.
- On the Message tab, select the Signature button, then Signatures… .
- Click New, then name and create your signature.
- To add a signature to emails automatically, select what signature you want added to new messages, and what signature you want added to replies/forwards.
- Click OK when you’re done.
- Close the message; the next time you create a new message, your signature will automatically appear.
- Click HERE for more help.
Out of Office Replies
Automatically send a reply when you’re out of the office.
- Click on the File tab.
- Click the Automatic Replies button.
- Set up your message, and time range.
- Click OK when you’re done.
- Click HERE for more help.
Recall or Replace an Email Message that you Sent
With message recall, a message that you sent is retrieved from the mailboxes of the recipients who haven’t yet opened it. You can also substitute a replacement message. For example, if you forgot to include an attachment, you can try to retract the message, and then send a replacement message that has the attachment.
Message recall is available after you click Send and is available only if both you and the recipient have an Office 365 or Microsoft Exchange email account in the same organization.
- In the folder pane on the left of the Outlook window, choose the Sent Items folder.
- Open the message that you want to recall. You must double-click to open the message. Selecting the message so it appears in the reading pane won’t allow you to recall the message.
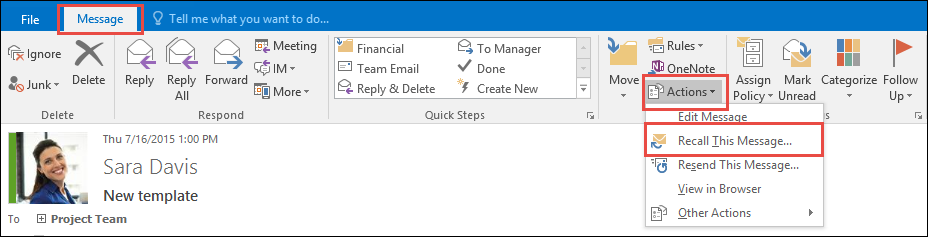
- From the Message tab, select Actions > Recall This Message.
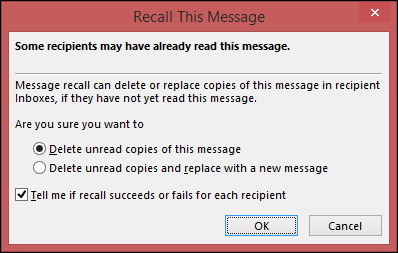
- Click Delete unread copies of this message or Delete unread copies and replace with a new message, and then click OK.
- If you’re sending a replacement message, compose the message, and then click Send.
- Click HERE for more information.
Delay or Schedule Sending Email Messages
You can delay the delivery of an individual message by having them held in the Outbox for a specified time after you click Send.
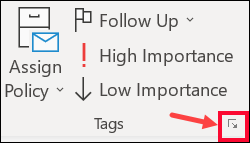
- While composing a message, select the More options arrow from the Tags group in the Ribbon:
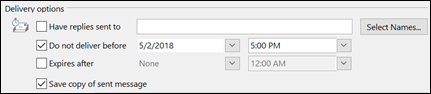
- Under Delivery options, select Do not deliver before checkbox, and then click the delivery date and time you want:
- Click Close.
- When you’re done composing your email message, select Send.
- After you click Send, the message remains in the Outbox folder until the delivery time.
- Click HERE for more help.
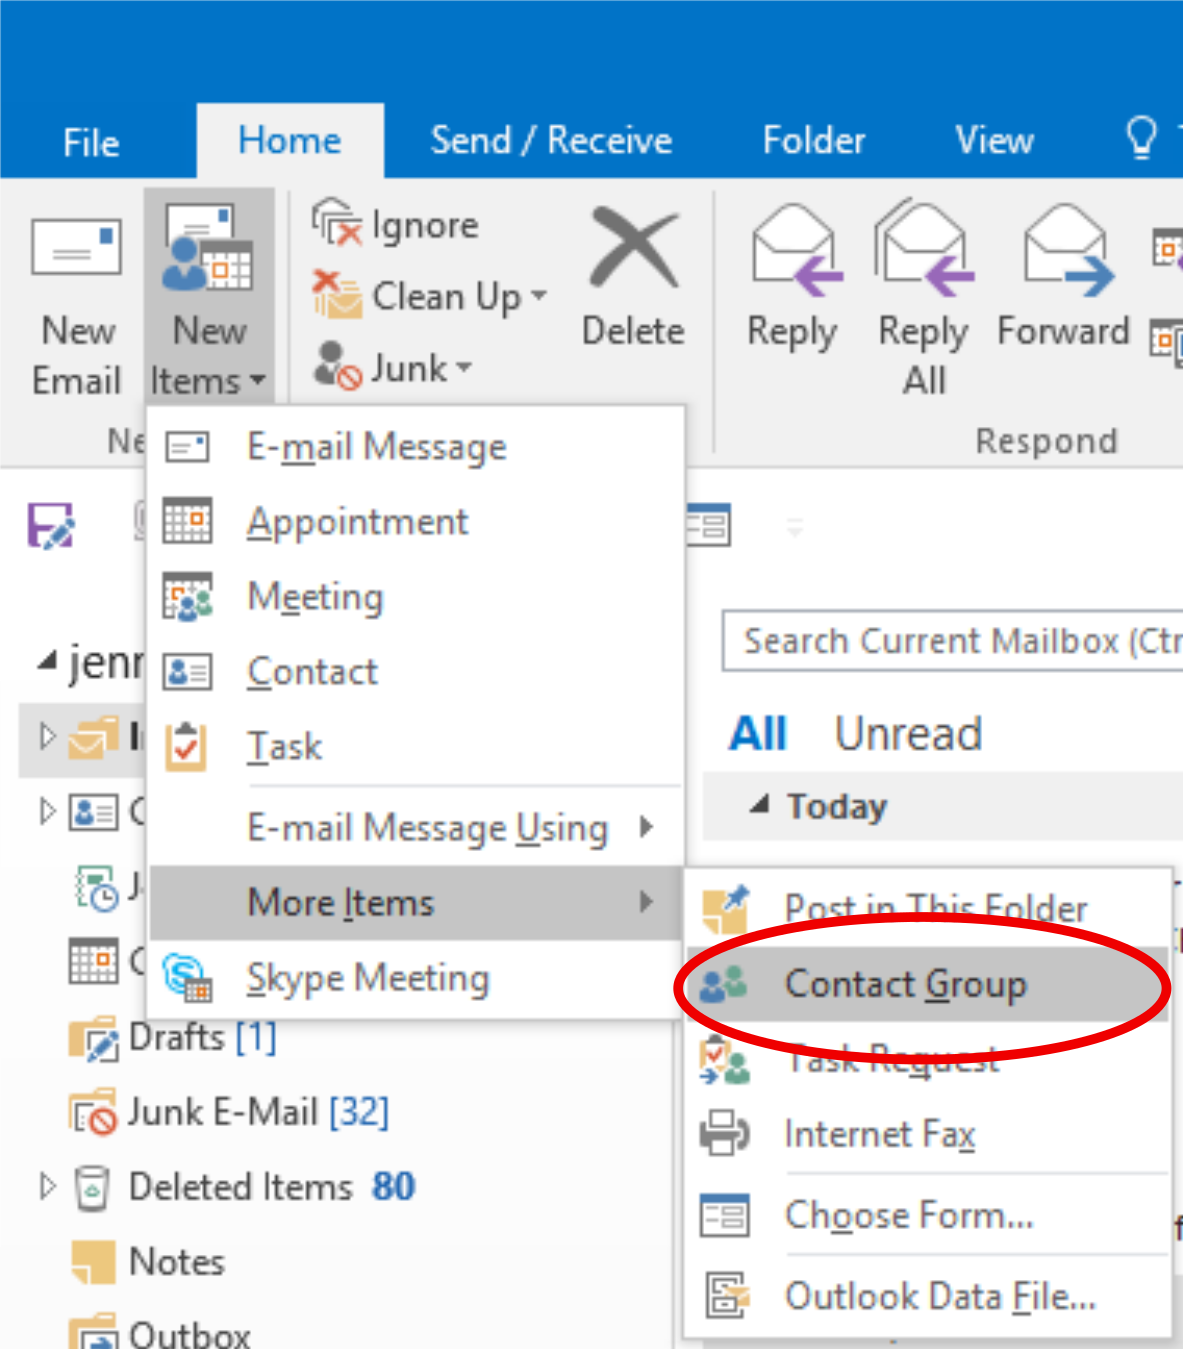
Create a Contact Group
If you regularly send e-mail messages to a group of people, you can create a contact group to simplify addressing messages and meeting requests. After a contact group is created, you can send a message or meeting request to multiple recipients at the same time. Contact groups can include anyone with a valid e-mail address.
- On the Home ribbon, click New Items → More Items → Contact Group
- Keyboard shortcut: Ctrl+Shift+L
- In the new group window, enter the information you want to include for the group:
- Name is the display name for the group.
- Add Members lets you enter the members you want in your group.
- Notes is where you can add information about the group.
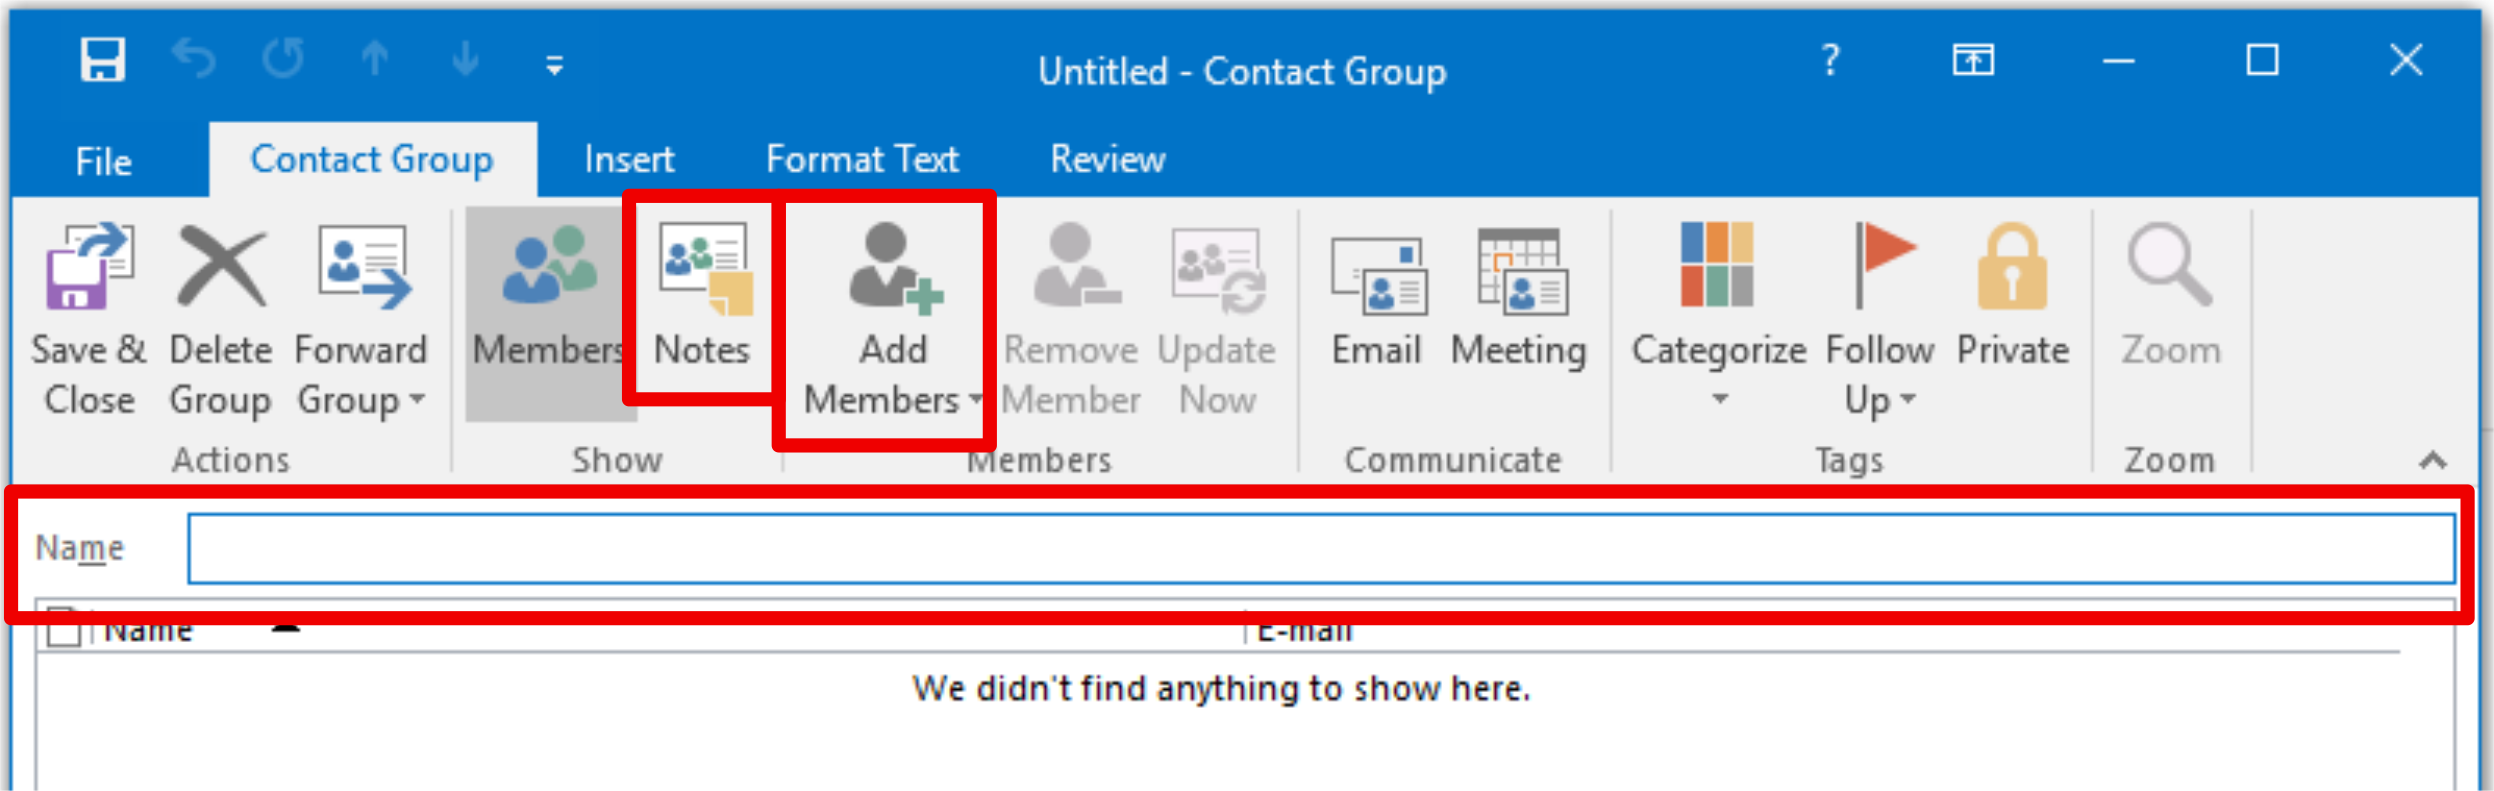
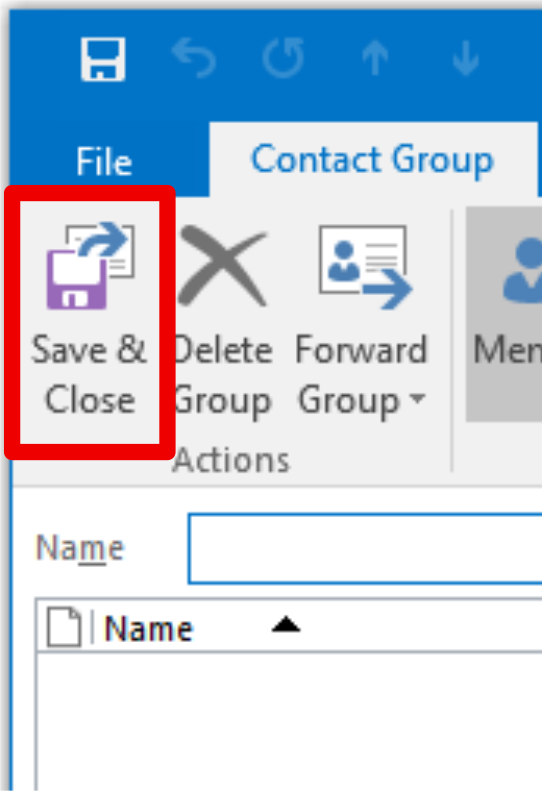
- When you are done, click Save and Close. Your new contact group will be saved in your contacts list.
Faxing Through Outlook
Please see Faxing with Esker on Demand.
Microsoft Help
Click HERE to visit Outlook help & learning.